Discover why the Weiss Distribution Technique (WDT) is the secret to perfect espresso. We analyze needle thickness, compare DIY vs. pro tools, and reveal the science behind clump-free extraction to stop channeling.
Key Takeaways
- Needle Gauge Criticality: Needles thicker than 0.4mm create channels rather than fixing them; 0.3mm to 0.35mm is the sweet spot.
- Deep WDT is Mandatory: Merely raking the surface leaves lower density pockets near the basket floor, leading to uneven extraction.
- Measurable Results: Refractometer data indicates WDT can increase Extraction Yield (EY) by up to 1.5% compared to tapping alone.
- Safety First: Proper storage is essential to prevent injury from acupuncture-grade needles and to protect the delicate tips from bending.
The nightmare scenario is all too familiar for home baristas upgrading their setup. You finally purchase a precision basket and a naked portafilter to diagnose your shots. You grind, tamp, and pull the lever. But instead of a syrupy, golden cone of espresso, a violent jet of hot coffee sprays across your kitchen counter. This is channeling, and it is the enemy of flavor.
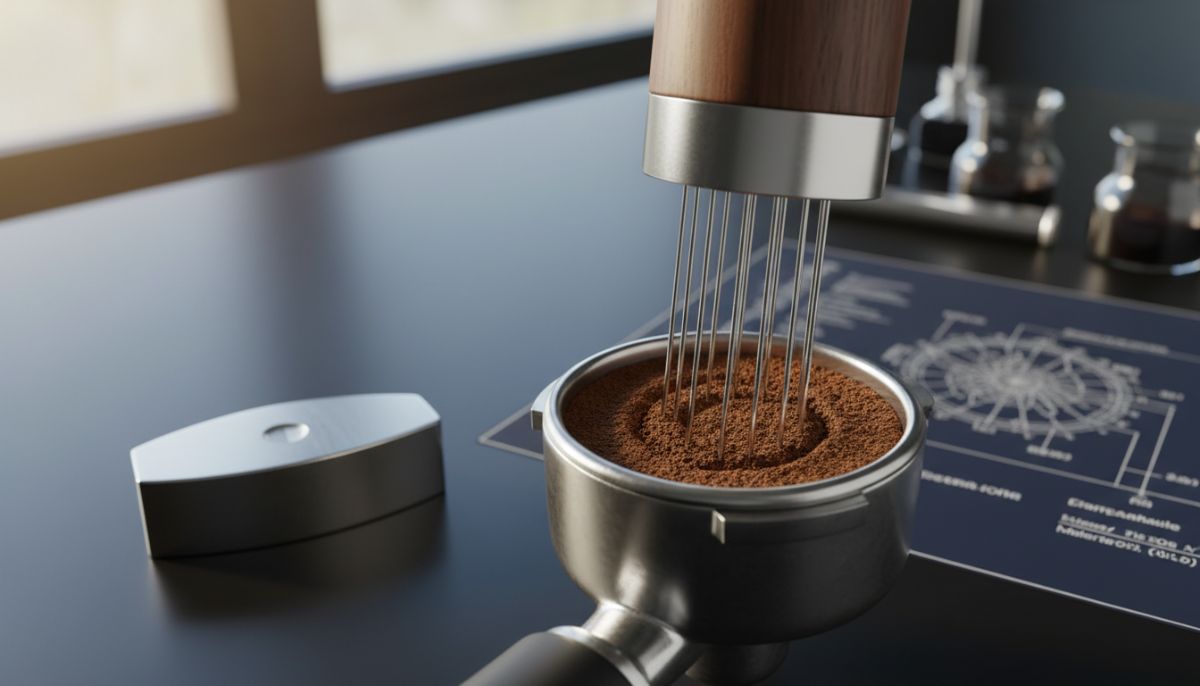
Enter the Weiss Distribution Technique, or WDT. Once a niche ritual practiced by obsessed hobbyists on coffee forums, the WDT tool has revolutionized espresso preparation. It is no longer just about declumping; it is about fundamentally restructuring the coffee puck to ensure water flows through every grain evenly. But not all needles are created equal, and the technique matters just as much as the tool.
The Physics of the Puck: Why Clumps Kill Quality
To understand why a WDT tool is necessary, one must look at what happens inside the grinder. As coffee beans are pulverized, static electricity and residual oils cause the grounds to stick together, forming clumps. In the high-pressure environment of an espresso basket (9 bars is roughly 130 PSI), water acts like electricity—it follows the path of least resistance.
Clumps act as density barriers. Water flows around them, speeding up through the looser areas of the puck. This creates a dual failure: over-extracted bitter notes from the high-flow channels and under-extracted sourness from the dry clumps. It creates a muddled flavor profile that no amount of fancy beans can fix. By mechanically breaking these clumps and distributing the grounds, you create a uniform resistance across the entire bed.
Did You Know?
The Weiss Distribution Technique is named after John Weiss, a Ph.D. scientist who introduced the concept on the Home-Barista forums in 2005. His original proposal involved using a dissected acupuncture needle to stir the grounds, proving that science and coffee have always been intertwined.
Needle Gauge Matters: The Goldilocks Zone
A common mistake is assuming any pointy object will suffice. Early adopters used paperclips or toothpicks. This is scientifically counterproductive. A standard paperclip is approximately 0.8mm to 1.0mm thick. In the world of espresso fines, that is a boulder. Dragging a paperclip through coffee grounds does not break clumps; it ploughs deep furrows, actually creating channels that water will rush through later.
Deep research and community testing have identified the optimal needle thickness range:
- 0.20mm – 0.25mm: Extremely effective at fluffing but often too flexible. They may struggle to move dense clumps in lighter roasts without bending.
- 0.30mm – 0.35mm (The Sweet Spot): These offer the perfect balance of stiffness and subtlety. They slice through clumps without displacing too much coffee, leaving the bed perfectly fluffy.
- 0.40mm: Acceptable for darker roasts, but borders on being too disruptive for high-precision baskets.
- 0.50mm+: Avoid. These act more like rakes than distributors.
If you are exploring the science of puck prep, you will find that thinner needles correlate with higher extraction yields because they leave fewer voids behind.
Technique: Deep Stirring vs. Surface Raking
Owning the tool is half the battle; the motion is the other half. There is a debate between “Deep WDT” and “Surface Raking.” The data suggests that Surface Raking is largely cosmetic. It makes the top look nice, but hidden density variances remain at the bottom of the basket.
The Optimal Motion:
- The Deep Stir: Insert the needles all the way to the bottom of the basket. Use small circular motions, moving around the perimeter and spiraling inward. This ensures the coffee density at the bottom—where the flow restriction primarily occurs—is uniform.
- The Rake: Slowly lift the tool while continuing the circular motion to fluff the upper layers.
- The Level: Use the tool to gently rake the surface flat before tamping.
This process is significantly cleaner if you utilize dosing funnels. Without a funnel, aggressive deep stirring will almost certainly result in grounds spilling over the edge, wasting expensive coffee.
Data Analysis: The Taste Impact
Does this extra step actually change the flavor, or is it just barista theatre? To answer this, we look at Total Dissolved Solids (TDS) and Extraction Yield (EY). Higher extraction (without astringency) generally means more flavor clarity and sweetness.
| Method | Needle Size | Avg. Extraction Yield | Shot Time Consistency (Variance) | Flavor Profile |
|---|---|---|---|---|
| Stock (Tap to settle) | N/A | 18.2% | High (±5 sec) | Inconsistent, often sour/bitter mix |
| Paperclip Stir | ~1.0mm | 18.5% | High (±4 sec) | Pronounced channeling, harshness |
| WDT (Surface only) | 0.35mm | 19.1% | Medium (±2 sec) | Better clarity, occasional spurting |
| Deep WDT | 0.35mm | 20.4% | Low (±1 sec) | High sweetness, distinct notes |
The jump from 19.1% to 20.4% extraction is massive in terms of palate perception. It is the difference between a good shot and a “god shot.” For those interested in the metrics, check out our guide on understanding TDS and extraction yield.
DIY vs. Premium Tools
The beauty of the WDT revolution is its accessibility. You do not need to spend a fortune, though premium tools offer workflow advantages.
The DIY Cork Method
Pushing acupuncture cleaning needles into a wine cork is the classic budget hack. It costs less than $5. However, ensure the needles are straight. If you insert them at odd angles, the tool becomes wide and unwieldy, pushing grounds to the edges of the basket (creating a donut extraction).
3D Printed Tools
The community has released hundreds of free designs. These often feature ergonomic handles and perfectly spaced needle patterns. The downside is durability; PLA plastic can be brittle, and 3D printed surfaces can harbor coffee oils over time.
Machined Metal Tools
Premium aluminum or steel distributors add weight and stability. They often come with stands that protect the needles. While they perform similarly to a well-made DIY tool, the longevity and aesthetic appeal are superior. When comparing an espresso distribution tool vs. tamper, remember that WDT fixes the internal structure, while levelers (wedge tools) only compress the surface.
Workflow and Maintenance
Integrating WDT requires a smooth workflow to avoid frustration. Static is the main annoyance here. If your grinder produces static-charged grounds, they will cling to the needles, pulling coffee out of the basket when you lift the tool. Implementing the RDT method (spraying beans with water) before grinding drastically reduces this mess.
Pros and Cons of WDT
| Pros | Cons |
|---|---|
| Eliminates channeling and spurting | Adds 15-20 seconds to workflow |
| Increases extraction yield and sweetness | Sharp needles pose an injury risk |
| Allows for finer grinding without clogging | Needles are fragile and bend easily |
| Cheap to implement (DIY options) | Requires a dosing funnel to avoid mess |
Conclusion
The WDT tool has transitioned from a coffee geek curiosity to an essential instrument of espresso preparation. By addressing the root cause of uneven extraction—inconsistent density and clumping—needle distribution offers the highest return on investment for improving flavor. Whether you stick needles in a cork or buy a precision-machined tool, the key lies in the technique: thin needles, deep stirring, and a gentle hand. Only then can you truly tame the chaos inside the portafilter.
Frequently Asked Questions
The consensus among coffee experts is that needles between 0.30mm and 0.35mm are ideal. They are stiff enough to break clumps but thin enough not to create new channels in the coffee bed. Needles thicker than 0.4mm act like rakes and can worsen extraction.
Yes. Even high-end grinders produce clumps due to humidity, oils, and static. Furthermore, the act of dosing into the portafilter creates uneven mounds of coffee. WDT ensures uniform density across the basket, which is critical for consistent shots.
A WDT tool uses needles to stir and fluff the entire depth of the coffee bed, fixing density issues at the bottom. A wedge distributor (leveler) only flattens and compresses the top surface. For best results, WDT is essential, while wedge distributors are optional.
It is not recommended. Paperclips are typically 0.8mm to 1.0mm thick. Dragging them through espresso grounds creates deep furrows (channels) rather than fluffing the coffee, often leading to worse channeling and spurting.
Using a dosing funnel is the best solution. It sits on top of your portafilter basket, increasing the height and allowing you to stir vigorously (Deep WDT) without pushing grounds over the edge.