Transform your home coffee game by mastering milk texturing. Learn the science behind microfoam, the critical differences between wet and dry foam, and the technique to pour latte art.
Key Takeaways
- Temperature Control: The ideal serving temperature for textured milk is between 60°C and 65°C (140°F–150°F); overheating denatures proteins and ruins texture.
- The Two Phases: Texturing consists of “stretching” (introducing air) and “spinning” (incorporating bubbles), both of which are required for microfoam.
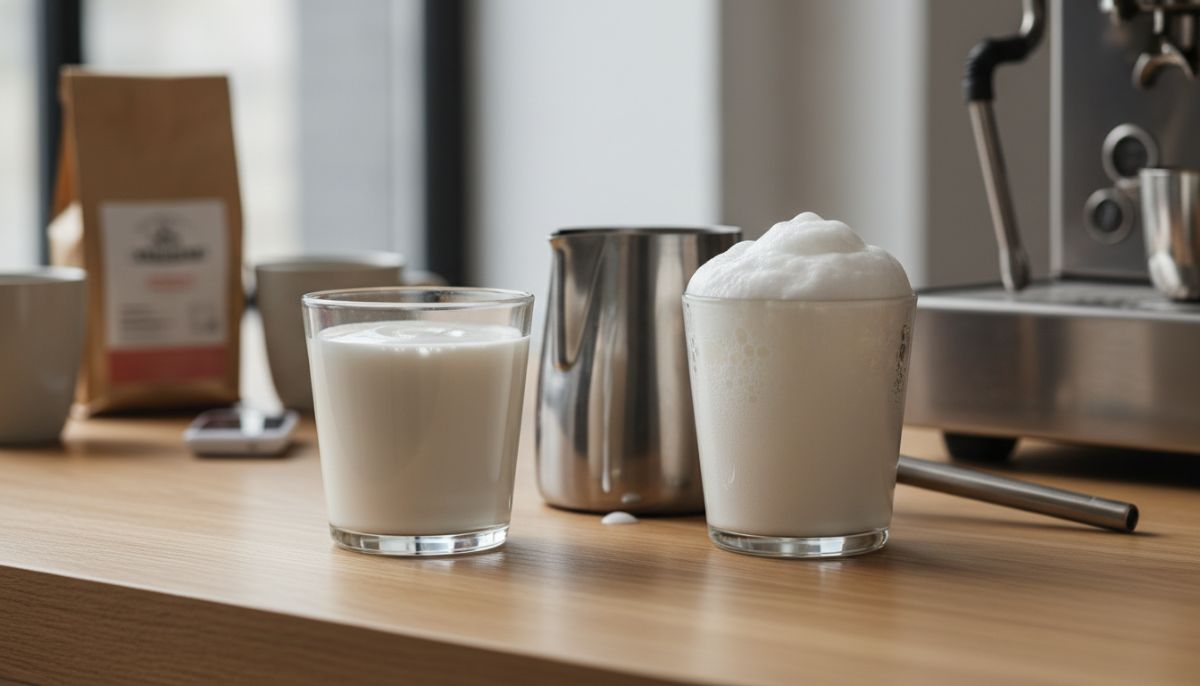
- Wet vs. Dry: Wet foam (microfoam) acts like liquid paint for lattes, while dry foam sits on top for traditional cappuccinos.
- Steam Pressure: Consistent steam pressure is vital; scale buildup is the silent killer of steam power.
There is a distinct moment of disappointment that occurs when you sip a homemade latte that feels thin and watery. You used good beans and your machine is warmed up, but the texture just isn’t there. It lacks that velvety, marshmallow-like mouthfeel you get at your favorite local cafe. The missing link is usually milk texturing.
Creating glossy, sweet microfoam is often harder to master than pulling the espresso shot itself. It requires understanding the physics of steam, the chemistry of milk proteins, and the precise hand movements of a barista. Whether you are aiming for a classic cappuccino or intricate latte art, the secret lies in how you manipulate the steam wand.
This guide will break down the mechanics of milk texturing, the difference between wet and dry foam, and how to troubleshoot common issues to elevate your morning brew.
The Science of Steam and Foam
Before diving into the technique, it helps to understand what is happening inside the pitcher. Milk consists of proteins (casein and whey), fats, and sugars (lactose). When you introduce steam, you are doing two things: heating the milk and injecting air.
As the temperature rises, the proteins unravel—or denature—and create a film around the air bubbles you inject. This structure traps the air, creating foam. The fats in the milk help stabilize this foam and provide that creamy mouthfeel. However, if you heat the milk too much (beyond 70°C), the proteins break down completely, releasing the air and leaving you with flat, burnt-tasting hot milk.
Furthermore, your equipment plays a massive role here. If your steam wand lacks pressure, you cannot create the vortex necessary to smash those bubbles into microscopic sizes. This is often an issue of maintenance. If you have neglected your water quality, scale buildup can choke your steam boiler. For a deeper dive on this, read about how scale from tap water impacts high-end machines.
Wet Foam vs. Dry Foam: What’s the Difference?
You will often hear baristas ask if you want your cappuccino “wet” or “dry.” This refers to the ratio of liquid milk to foam, and the texture of that foam.
Wet Foam (Microfoam)
Wet foam is the holy grail for third-wave coffee and latte art. The texture should resemble wet paint or melted ice cream. It is glossy, shiny, and the bubbles are so small they are barely visible to the naked eye.
In a drink with wet foam, the milk and foam are fully integrated. When you pour it, the milk flows under the crema of the espresso before rising to the surface, allowing for art. This is used for:
- Flat Whites
- Lattes
- Modern Cappuccinos
- Cortados
Dry Foam (Macrofoam)
Dry foam is much lighter and airier. It has larger bubbles and distinctly separates from the liquid milk. It sits on top of the espresso like a cloud rather than mixing with it. While less popular in modern specialty cafes, it is the standard for a classic Italian cappuccino.
Dry foam is created by stretching the milk for a longer duration, introducing more air volume before submerging the wand to spin the milk.
The Technique: Stretching and Spinning
Mastering microfoam requires two distinct phases during the steaming process. You cannot just shove the wand in and hope for the best.
Phase 1: Stretching (Aeration)
This is where you introduce air into the cold milk.
- Start with the steam tip just barely below the surface of the milk.
- Turn the steam on full power.
- Lower the pitcher slightly until you hear a sound like paper tearing (tsst-tsst-tsst).
This phase should only happen while the milk is cold—between 4°C and 37°C (40°F–100°F). Once the pitcher feels warm to the touch (human body temperature), you must stop stretching. If you stretch hot milk, you will get large, gross soap bubbles that won’t integrate.
Phase 2: Spinning (Emulsification)
Once you have enough foam (volume has increased by 20-30% for a latte), you need to integrate it.
- Raise the pitcher slightly to submerge the steam tip by about a centimeter.
- Find the “sweet spot” off-center in the pitcher to create a whirlpool.
- The milk should spin rapidly. This vortex smashes the large bubbles into tiny micro-bubbles.
Continue spinning until the pitcher becomes too hot to hold comfortably (approx 60°C). Shut off the steam, then wipe and purge your wand immediately.
Troubleshooting Texture Issues
Even with practice, things go wrong. Here is how to fix common milk problems.
The Milk is Screaming
If the wand makes a high-pitched screeching noise, the tip is too deep in the milk and no air is entering. Lower the pitcher immediately to introduce some air, then submerge again.
Large Bubbles on Surface
This usually happens if you stretched the milk too late in the process (when it was already hot). To fix this after steaming, give the pitcher a firm tap on the counter to pop the big bubbles, then swirl it vigorously to re-integrate the texture.
Milk is Flat and Watery
You didn’t introduce enough air at the start, or your steam pressure is weak. Weak pressure can sometimes be a machine fault, but ensure you aren’t fighting uneven flow issues elsewhere. While unrelated to steam, consistency in your workflow is key; if you are struggling with flow in your shots, check our guide on spotting and fixing uneven water flow.
The Importance of the Base Espresso
You can steam the most perfect, velvety microfoam in the world, but if you pour it over a bad shot of espresso, the drink will suffer. The contrast between the sweet milk and the rich espresso is what makes the drink work.
If your espresso is too thin or acidic, it will cut through the milk unpleasantly. This is often a result of underextraction. If you notice your milk drinks taste sharp rather than sweet, reviewing why your espresso tastes sour is a crucial step.
Furthermore, the volume of your espresso base matters relative to the amount of milk you steam. A common mistake is using too much milk for the yield of coffee produced. To get the balance right, you need to understand your output. Learn more about this in our article on dialing in espresso ratios and yield.
Equipment and Puck Prep
Finally, consistency is the key to improvement. Just as you use tools to ensure your puck is prepared perfectly every time, you should approach milk texturing with the same rigor. Using the same pitcher, the same amount of milk, and the same starting temperature helps you isolate variables.
While tools like distribution needles help with the espresso side—see our analysis on whether the WDT tool really matters—the only tool you have for milk is your hand and your ear. Listen to the sound of the stretch, feel the temperature increase, and watch the whirlpool.
Conclusion
Mastering milk texturing takes time. You will burn your fingers, spill milk, and drink plenty of bubbly cappuccinos before you pour your first perfect rosette. But understanding the distinction between wet and dry foam gives you control over the final cup.
Remember: stretch early while it’s cold, spin rapidly to texturize, and never overheat. With these fundamentals, you are well on your way to cafe-quality drinks at home.
Frequently Asked Questions
The ideal temperature for steamed milk is between 60°C (140°F) and 65°C (150°F). Going above 70°C (158°F) scalds the milk, breaking down sugars and proteins, which results in a burnt taste and loss of sweetness.
Large bubbles usually occur if you introduce air (stretching) when the milk is already too hot, or if you fail to create a vortex (spinning) to smash the bubbles into microfoam. You can try tapping the pitcher on the counter to pop them.
Wet foam (microfoam) has tiny, integrated bubbles and a glossy paint-like texture, ideal for lattes and latte art. Dry foam has larger bubbles, is stiffer, and sits on top of the coffee, which is traditional for old-school cappuccinos.
Yes, but it is more difficult. Alternative milks have different protein and fat structures. Oat milk generally textures best among non-dairy options, though it requires more aggressive stretching initially compared to whole dairy milk.