Maximize your coffee grinder’s potential with our comprehensive guide to burr alignment. Learn the whiteboard marker test, how to shim with foil, and achieve perfect particle uniformity.
Key Takeaways
- The Goal: Perfect parallelism between the top and bottom burrs ensures uniform particle size distribution, reducing astringency and muddiness.
- The Method: The "Marker Test" uses dry-erase ink to identify high and low spots on your burrs by observing wipe patterns.
- The Fix: Aluminum foil shims (approx. 0.01mm thick) lift low spots to match the high spots.
- The Result: Higher extraction yields, reduced channeling, and distinct flavor separation in both espresso and pour-over.
- Compatibility: This guide applies primarily to flat burr grinders (e.g., DF64, Fellow Ode, Eureka Mignon, Mahlkönig).
Many home baristas spend thousands on high-end espresso machines yet neglect the most critical variable in the chain: the mechanical precision of their grinder. You might own a premium flat burr grinder, but if the burrs are not perfectly parallel, you are sacrificing clarity and sweetness. This is where burr alignment comes into play.
Factory tolerances vary. Even reputable brands like Eureka or Fellow can ship units where the burrs sit slightly askew. This misalignment causes one side of the burr set to grind finer than the other, creating a mix of "boulders" (coarse chunks) and "fines" (dust). This leads to uneven extraction and the dreaded channeling. By performing a marker test and shimming your burrs, you can achieve commercial-level uniformity at home.
The Physics of Alignment: Why It Matters
To understand alignment, we must look at Particle Size Distribution (PSD). In an ideal scenario, a grinder produces particles that are all identical in size. While physically impossible, we aim to narrow the "bell curve" of particle sizes as much as possible.
When flat burrs are misaligned (not parallel), the gap between them changes as they rotate. This creates a wobble effect (runout). As a result:
- Radial Alignment: The burrs are centered on the shaft (usually fixed by the manufacturer).
- Parallel Alignment: The cutting faces of the top and bottom burrs are perfectly equidistant at all points (this is what we fix with shims).
Misalignment forces you to grind finer to compensate for the boulders, introducing excessive fines that clog your portafilter. This restricts flow and often results in bitterness. Properly aligned burrs allow you to grind finer without choking the machine, unlocking higher extraction yields. For a deeper dive on how geometry impacts taste, read our guide on flat vs. conical burrs.
Tools Required
Before voiding any warranties or opening your machine, gather the following:
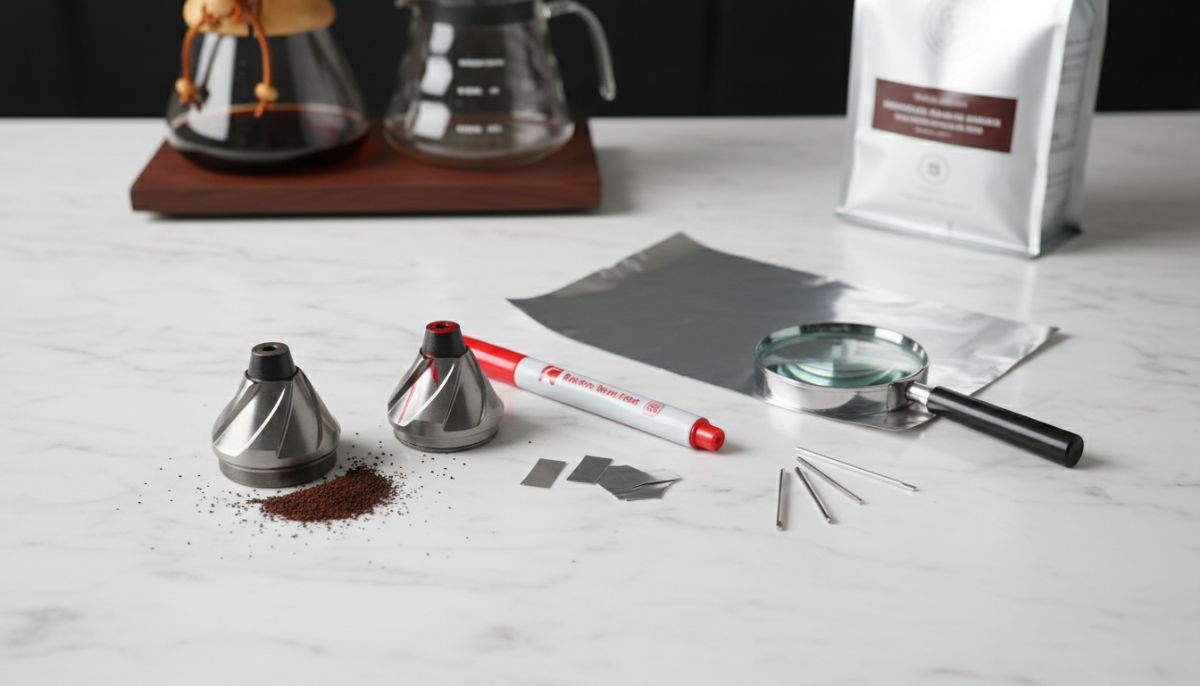
- Dry Erase Marker (Whiteboard Marker): Do not use a permanent Sharpie. You need ink that transfers easily upon contact. Red or green often shows up better than black on metallic surfaces.
- Screwdriver Set: A high-quality set prevents stripping screw heads. For advanced users, a Torque Screwdriver ensures you tighten screws evenly (crucial for maintaining alignment).
- Aluminum Foil: Standard kitchen foil is approximately 0.01mm to 0.02mm thick. This is often superior to commercial shim stock because it allows for micro-adjustments.
- Scissors or Exacto Knife: For cutting precise shims.
- Cleaning Tools: A brush and vacuum. If you struggle with static retention during reassembly, review the RDT method guide.
Safety and Disassembly
WARNING: Always unplug your grinder before disassembly. Grinder motors have high torque and can cause serious injury.
- Unplug the Unit: Verify the power is disconnected.
- Remove the Hopper/Collar: Unscrew the adjustment dial or top collar to expose the burr chamber.
- Clean Thoroughly: Use a vacuum to remove all coffee grounds. Any debris between the burr and the carrier will cause false misalignment readings. The surfaces must be surgically clean.
- Identify Carriers: You will generally align the moving burr (usually the bottom) and the stationary burr (usually the top) independently, though most gains come from aligning the stationary top burr first as it is easier to shim.
The Marker Test: Step-by-Step
The marker test reveals the "high spots" where the burrs are touching first.
1. Apply the Ink
Take your dry-erase marker and color the entire outer flat edge of the burr teeth. You do not need to color the cutting teeth inside, just the flat outer rim where the burrs make contact at the "zero point." Ensure the ink is even.
2. Reassemble and Find Zero
Reassemble the grinder carefully. Turn the grinder on (if safe and required for your model, like the DF64) or rotate the shaft manually by hand (safer). Slowly adjust the grind setting finer until you hear the first faint "chirp" sound of metal-on-metal contact. STOP immediately.
Do not force the burrs together. The goal is to let the high spots barely kiss the ink.
3. The Wipe Pattern Analysis
Disassemble the grinder again and inspect the ink on the burrs.
- Perfect Alignment: The ink is wiped off clean around the entire 360-degree circumference. No shimming is needed.
- Misalignment: The ink is wiped off only in one specific section (e.g., from 12 o’clock to 3 o’clock). This wiped section is your High Spot.
- The Low Spot: The area where the ink remains untouched is your Low Spot. The gap is too wide here.
The Shimming Strategy
To fix misalignment, you must raise the Low Spot to match the height of the High Spot. You do this by placing shims under the burr, between the back of the burr and the metal carrier.
How to Place Shims
- Remove the Burr: Unscrew the burr from the carrier. Keep track of the orientation (mark a line on the carrier and burr side with a marker).
- Cut the Foil: Cut small rectangles of aluminum foil, roughly the size of the area where the ink remained (the low spot).
- Placement: Place the foil shim on the carrier deck corresponding to the low spot.
- Reinstall Burr: Screw the burr back on top of the shim. Tighten the screws gradually in a star pattern to ensure even tension.
Pro Tip: Start with one layer of foil. Re-do the marker test. If the wipe pattern improves (covers more area) but isn’t full, add a second layer. If the wipe pattern shifts to the opposite side, you have over-shimmed.
The Settling Period and Verification
Once you achieve a full wipe (or at least an 80-90% wipe), you are technically aligned. However, aluminum foil compresses.
After shimming, grind about 100g of cheap coffee beans (seasoning). This pressure helps settle the burrs into the foil. Check the screw tightness again. Misalignment here often causes channeling in espresso, so verify your work with a taste test.
Troubleshooting Common Issues
The "Floating" Carrier
In some grinders (like early DF64 models), the upper burr carrier sits loosely in the springs. Taping the circumference of the carrier with plumbers tape can reduce this play, but be careful not to jam the mechanism.
Motor Stalling
If your motor stalls after shimming, you may have over-shimmed, causing the burrs to lock up before the motor can spin. Back off the zero point. If you are using a single-dosing workflow, ensure you are not feeding beans in before the motor starts. See our guide on single dosing workflows for best practices.
Inconsistent Ink Wipes
If the wipe pattern changes randomly every time you test, your burr carrier likely has too much "runout" or wiggle. In this case, shimming the burr won’t help because the carrier itself is unstable. This requires more advanced modifications like sanding the carrier or replacing the unit.
The Taste Test: Before and After
Visual confirmation is good; taste is better. An unaligned grinder typically produces espresso that is sour (under-extracted boulders) and bitter (over-extracted fines) simultaneously. Once aligned, you should notice:
- Clarity: Distinct flavor notes rather than a muddied profile.
- Sweetness: A significantly larger sweet spot.
- Flow Rate: The ability to grind finer without choking the machine.
If your espresso still tastes harsh, you might be dealing with other extraction issues. Check our guide on how to fix bitter espresso to rule out recipe errors.
Frequently Asked Questions
Technically, yes. Disassembling the burr chamber and modifying the alignment with foil shims usually voids the manufacturer’s warranty. Proceed with caution and understand the risks involved.
Generally, no. The marker test is designed for flat burrs where parallelism is the main variable. Conical burrs rely on concentricity, which is much harder to adjust with simple shims.
Start with one layer. Standard kitchen foil is about 0.01-0.02mm thick. Most misalignments require 1 to 3 layers. If you need more than 4-5 layers, the grinder’s machining tolerances may be significantly off.
You do not need to check often. Once aligned, the burrs should stay in place unless you drop the grinder, change the burrs (e.g., upgrading to SSP), or disassemble the carriers for deep cleaning.